


2018 School Spending Survey Report
STEAM Project Recipes: Insta-Robots and Sewing Art
Step-by-step illustrated instructions for sewing and robot-building activities from SLJ's 2016 School Librarian of the Year.
Two STEAM project recipes from Todd Burleson, SLJ’s 2016 School Librarian of the Year.

All photos courtesy of Todd Burleson
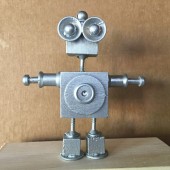
Insta-Robot
Fun mini robot figures
Ingredients
- A variety of small wooden shapes
- Various miscellaneous hardware (screws, nails, etc.)
- Hot glue gun
- Hammer
- Screwdriver
- Washable paint
- Paint brushes
- Vice or clamps
- Hand drill
Create
Begin by having students brainstorm everything they know about robots. What can they do? What do we wish they could do? What do they look and sound like?
Survey the materials with students. Explain that they are going to create their own robots today, and have them sketch their perfect robot.
Some guidelines: The robots should be between two and four inches tall. They should include at least three geometric shapes and be able to stand on their own.

Once students have designed their robot, they should paint all the parts.
Next, students should attach the wooden parts with hot glue and use the various pieces of hardware to create the face, arms, etc.
Tip: If students clamp their wooden pieces and use a nail to tap a small hole where they want to put a screw, the screw will go in much more easily. Alternatively, students can use a hand drill with a tiny drill bit to create a 'pilot' hole.
Extensions
- Students can develop their robot's personality by writing a short story about a day in the life of their robot.
- Using a simple miter box, students can create a display box for their creation.
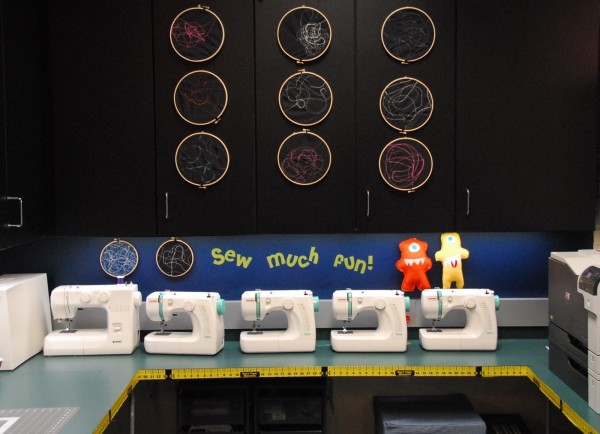
Super Simple Sewing Art
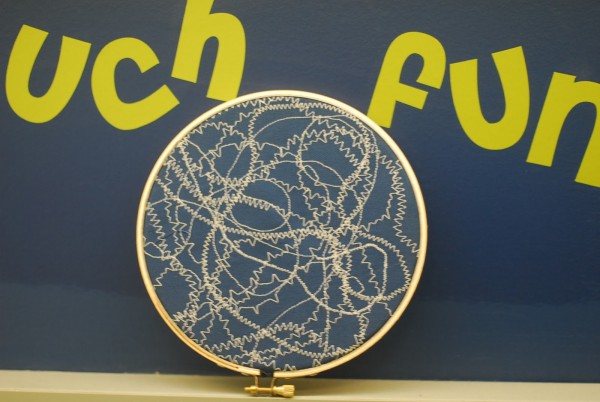
Abstract or geometric designs created with a sewing machine.
Ingredients
- Sewing Machine (I recommend the Janome 3128. It's rugged, easy to use, and relatively simple to thread.)
- Square of cotton fabric
- Thread in a contrasting color
- A six to 10” embroidery hoop
- Fabric scissors
Prepare I recently taught this lesson to third and fourth grade students, many of whom had never used a sewing machine before. Taking the time to teach students how to thread the sewing machine benefits everyone 10 times over.
I first demonstrate how to thread the “top” thread. The bobbin, which on our machines is a drop-in variety, is also challenging for students. Typically, 90 percent of the issues I’ve experienced involve this top thread. Most machines, like the Janome, have a threading guide with visuals that are extremely helpful for new learners. Once students feel comfortable threading the machine, we walk through its basic components.

Create
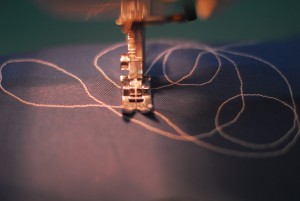
Have students try fastening the fabric piece with the presser foot and learning how much pressure to put on the foot pedal. They can “sew through” a piece of fabric to get a sense for how the process works. When they are confident, have them put the fabric they wish to use for their project on the machine. They can choose any ‘stitch’ on the dial to begin.
Then have them experiment with each of the stitches by rotating, stopping, and pivoting with the needle in the fabric.
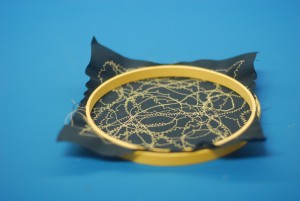
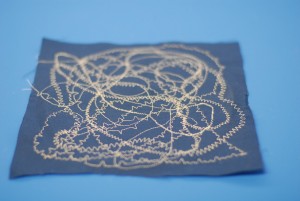
When they are done, their stitches will crisscross over the entire piece of fabric and reveal a fascinating design. After snipping the ends of the thread, have students unclamp the embroidery hoop. Have them put the fabric over the inner hoop and slide the outer hoop over it.

Trim off the excess fabric. Hang and enjoy!
Extensions
- Students can use this technique to add texture to any project that includes fabric.
- They could write their names on fabric in cursive with chalk and then try to follow the ‘path’ with the machine to sew their name.
- They could create a tic-tac-toe board with their stitches and use small stones or coins to play.

Added To Cart
RELATED


RECOMMENDED
CAREERS
The job outlook in 2030: Librarians will be in demand
CAREERS
The job outlook in 2030: Librarians will be in demand
ALREADY A SUBSCRIBER? LOG IN
We are currently offering this content for free. Sign up now to activate your personal profile, where you can save articles for future viewing
ALREADY A SUBSCRIBER? LOG IN
Thank you for visiting.
We’ve noticed you are using a private browser. To continue, please log in or create an account.

Add Comment :-
Comment Policy:
Comment should not be empty !!!
Lucy
These are great ideas! So simple and yet the finished project is so polished. Thanks for the inspiration.Posted : Jan 31, 2017 09:18